Genshin Impact Lost Riches 2026: Secret Trove 1 Guide and Tile Puzzle Solution
Lost Riches 2026 returns to Genshin Impact, sending Travelers to Araumi to unearth Secret Trove 1 by solving a cryptic tile puzzle.
As the sun rises over Inazuma’s storm-battered shores, Travelers once again feel the familiar tug of buried treasure. The Treasure-Seeking Seelie has fluttered back into players’ gadget inventories with the 2026 edition of the Lost Riches event, and this year Ulman, the ever-wandering merchant, has stashed his riches beneath the ancient ruins of Araumi. For those ready to dig, the first Secret Trove is within reach—but without cracking a cryptic tile puzzle, the loot stays locked underground like a casket sealed by forgotten magic.
How to Start the Treasure Hunt
The first step couldn’t be simpler. Open the event menu, select Lost Riches, and read the on-screen instructions—or skip them if you’re the type who tosses an IKEA manual aside and trusts your instincts. Travel to the event marker and chat with Ulman, who hands over the Treasure-Seeking Seelie gadget. Equip it immediately; this tiny entity is going to be your most loyal companion, vibrating and glowing like a magnetic compass needle whenever valuables are near.
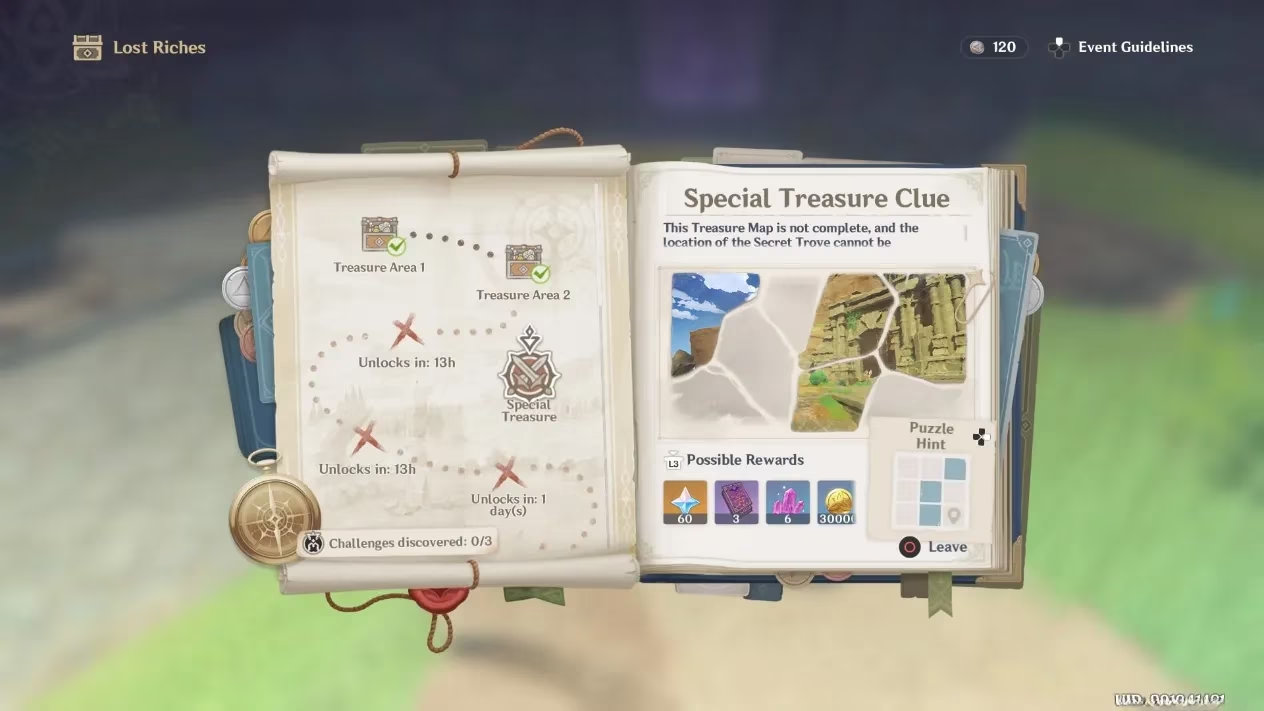
Collecting Iron Coins in Treasure Areas 1 and 2
The event’s first day unlocks two search zones, each sprinkled with Iron Coins. The areas are compact, so there’s no need to comb the whole island; simply activate the Seelie and wander around. It will hum and pulse when you tread close to a hidden cache—much like a dowsing rod that quivers over subterranean water. Don’t stress about missing a spot, either. You can retrace your steps freely, and the Seelie’s reaction resets every time you enter its detection radius.
Once you’ve gathered all coins in both areas, you’ll have collected four of the eight photo fragments that form the Special Treasure Clue. Veteran treasure hunters know this is only half the puzzle. The remaining four pieces wait in Treasure Areas 3 and 4, which unlock on Day 2, making the full map as tantalizingly incomplete as an archaeologist’s first unearthing of shattered pottery—each shard hints at the vessel’s shape, but only the complete set reveals its true form.
Locating Secret Trove 1
Even with a torn photograph, the location is unmistakable. The stone archways and moss-covered pillars point to Araumi, directly in front of the ruins’ main entrance. Teleport there, pull out your Seelie, and a notification will flash on the screen: “You are near the treasure trove.” The search area then appears on your minimap. Glide down to the indicated spot and wait for the Seelie to react. When it does, examine the ground to dig up the first special tile—a carved stone that initiates the real challenge.
Solving the Tile Puzzle
Now comes the intellectual hurdle. The game explains the mechanics with a short tutorial: some Secret Trove sites are paved with tiles that light up when stepped on and extinguish when touched again. Your goal is not to illuminate every tile, but to trace a specific pattern dictated by the Puzzle Hints displayed on the photograph fragments you currently possess.
Here’s where patience meets logic. On Day 1, you only see a partial hint—two or three connected tiles marked on a crude diagram. The trick is to start from the tile with the glowing symbol, then follow the shown path to light up the next few tiles. After that, you must deduce the remaining steps like a detective completing a partially burned cipher.
Think of this puzzle as a luminous hopscotch game played with high stakes. The board reacts to every footfall: one misstep can toggle a tile you didn’t mean to change, erasing your progress as surely as an errant wave smoothes a line drawn in the sand. The key is to move deliberately and observe the pattern. If you accidentally light a wrong tile, step back onto it to turn it off, then resume the correct sequence.
Crucially, each player’s puzzle is randomly generated, so no universal code exists. However, many first-day solutions—including the one encountered by dualshockers’ own guides—share a simple logic: after following the initial hint, you often need to deactivate the first tile again and return to the topmost tile to complete the shape. If your puzzle stumps you, try working backward. Imagine the final lit pattern and figure out which tiles need to stay dark, much like negative space in a painting defines the subject.

Final Tips and Event Outlook
-
Revisit previous search areas. If you’re stuck on the tile puzzle, collecting all possible photo fragments from future days will reveal the full hint. Day 2’s zones drop the missing pieces, making the solution almost trivial.
-
Ignore monster distractions. While exploring, you might aggro nearby hilichurls or slimes, but the puzzle itself remains unaffected by combat. Clear them first or just focus on the tiles.
-
The Seelie can be toggled off. If the constant glow becomes distracting, switch to another gadget temporarily and reactivate it when you’re ready to dig.
Genshin Impact continues to sprinkle its world with these bite-sized adventures, and Lost Riches 2026 feels like a warm reunion with an old friend—Ulman’s voice, the Seelie’s chirp, the satisfying \u201cthump\u201d of a wooden chest surfacing from the dirt. The event runs through late August, so even if you’re taking a relaxed pace, there’s plenty of time to unearth every Primogem and Mora the Inazuman soil has to offer.